
There has been a lot of stress and panic on Twitter today. It seems that Blogger is charging people to upload more pictures once they've reached their limit. No fear, Sal is here! Blogger is not the only way to upload pictures to your blog. This is a step by step tutorial (with screen shots!) for the lovely bloggers who don't know how to upload pictures from another website, such as Photobucket.
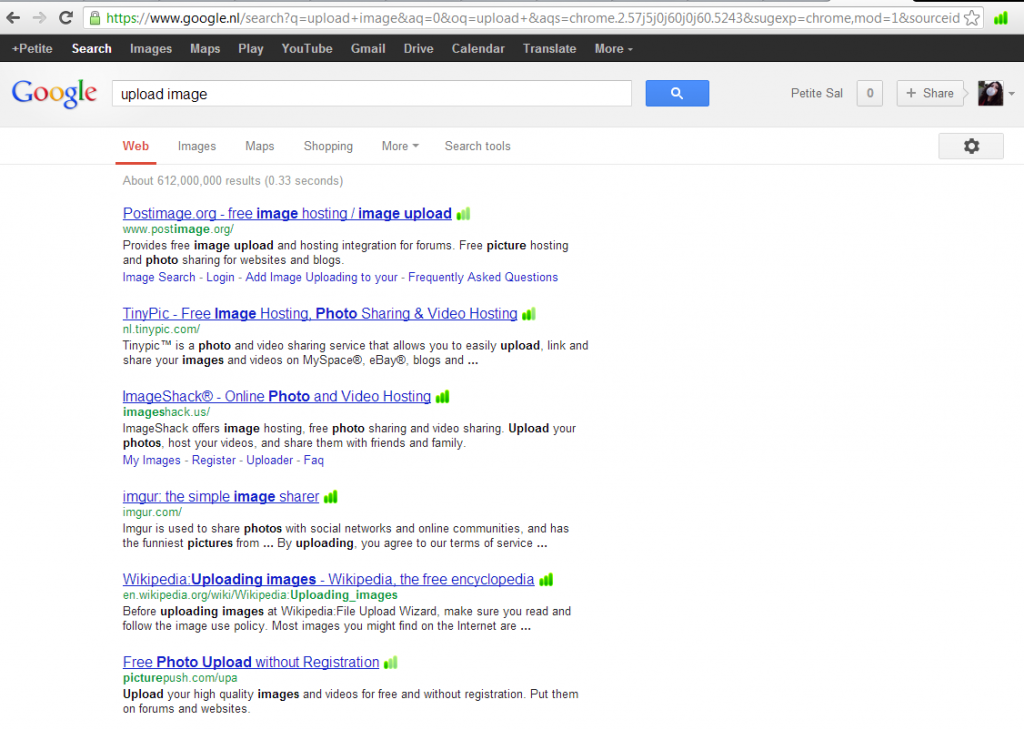
There are many websites that allow you to upload pictures. I googled it and this is a screenshot of the first page. You can use any website you like, but I'm using Photobucket for this tutorial. It was quite a coincidence; today I switched over to Photobucket too!
I'll be showing you the way I do it. Maybe I take too many steps, I don't know. If I do or you know a faster way to upload pictures, let me know in the comments!
I'll be showing you two methods today. One is a step by step method by using Photobucket and Photobucket only and the other is a method that can be used on any other website too.
Method #1
Step 1.
Go to Photobucket.com and sign up.
Well, that was easy!
Oh, I see I failed at taking the screen shot haha!
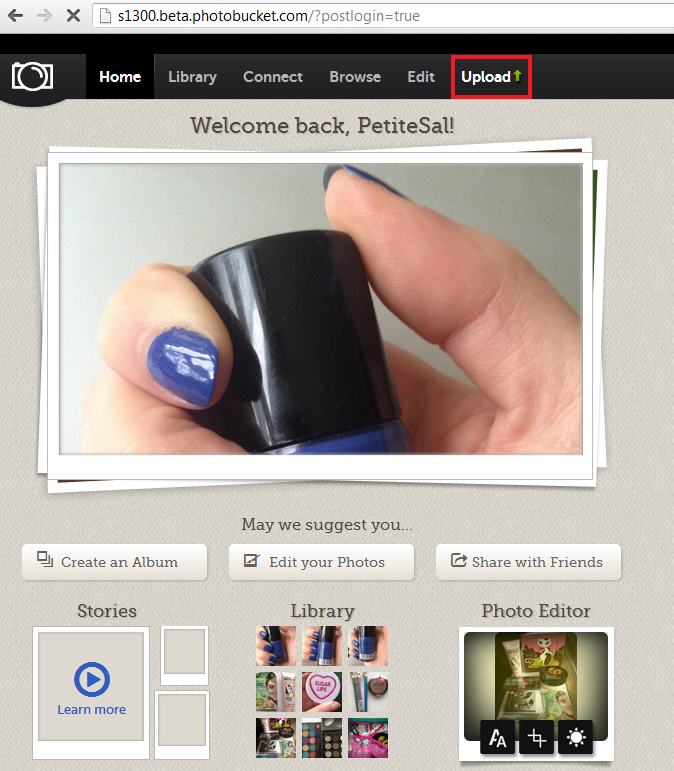
Step 2.
Click on upload. (marked red in the screen shot above)

Step 3.
Drag the pictures you want to upload to the big square.
Below you can choose which Album you upload them to. I selected "Library", because I have no albums yet.
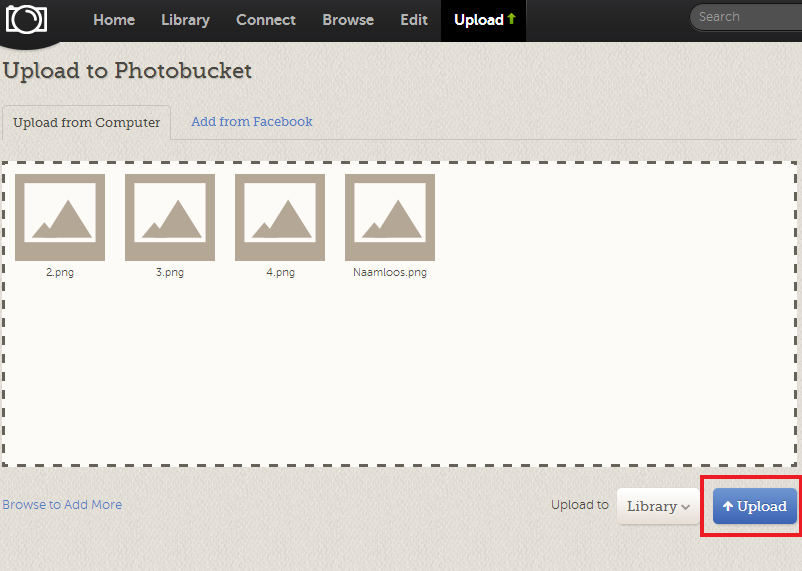
Step 4.
After you dragged them to the square, you can upload them by clicking on "Upload".
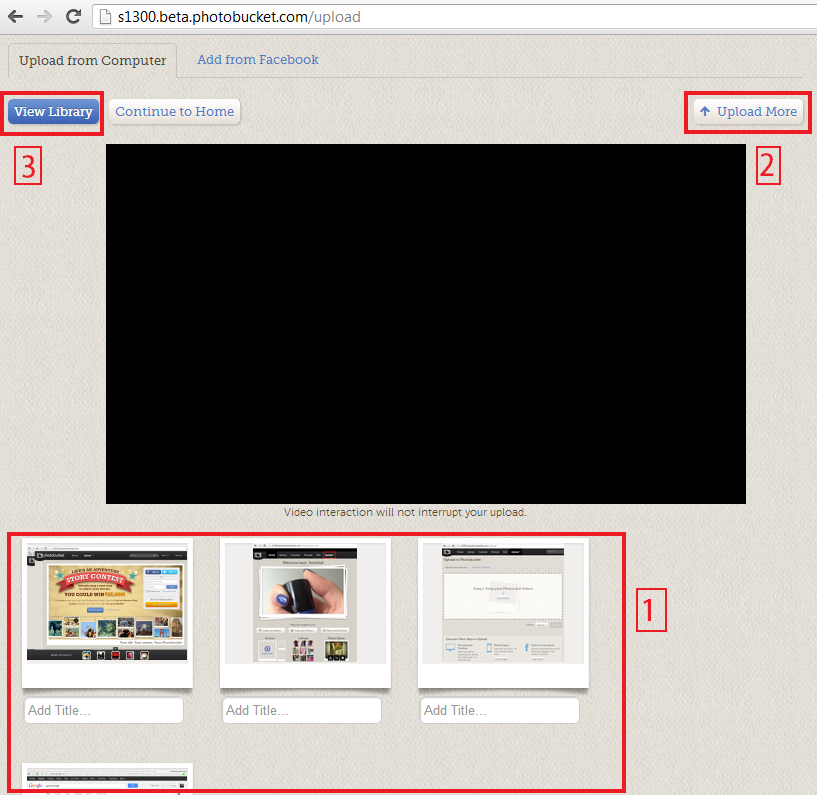
Step 5.
1 - Here you can see the pictures you have uploaded.
2 - Forgot to upload a picture? You can still upload more by clicking on "Upload More".
3 - Done uploading? Click on "View *album name* ". In this case it's "View Library".
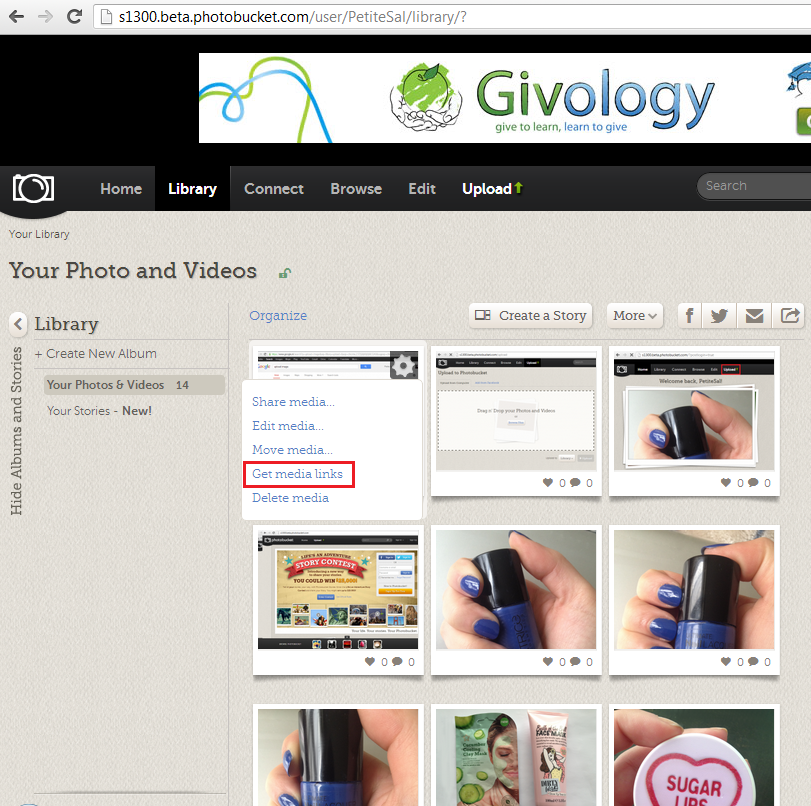
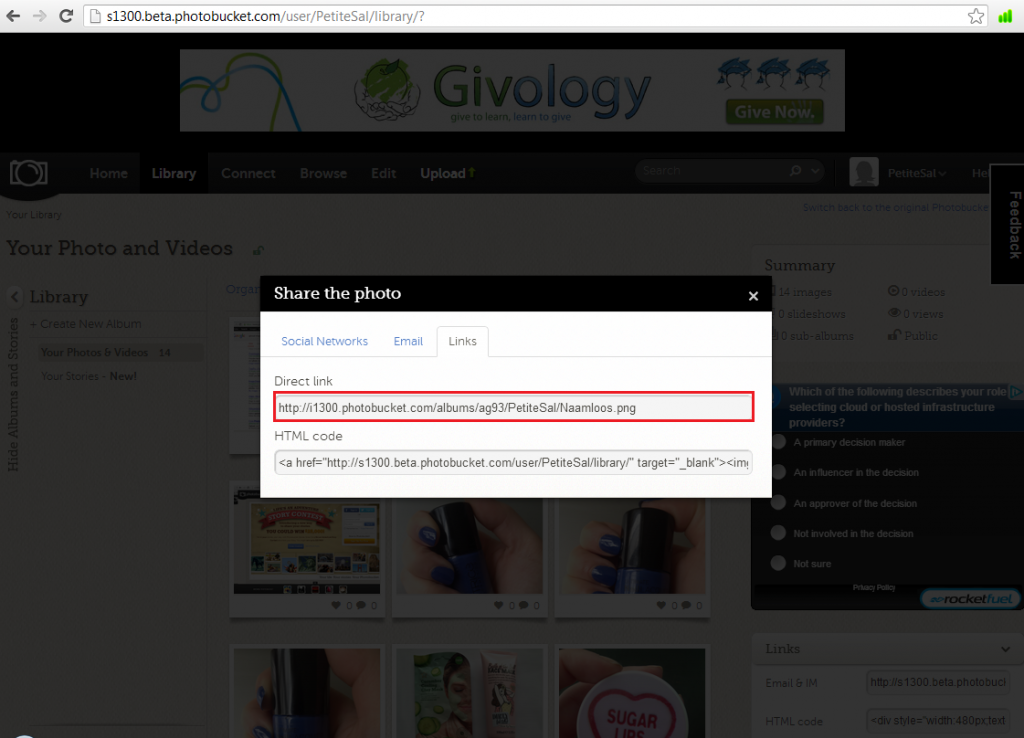
Step 6.
Drag your cursor over the image you want to add to your blog and you'll see a little screw or whatever it is. Put your cursor on it and you'll see a little menu. Click on "Get media links".
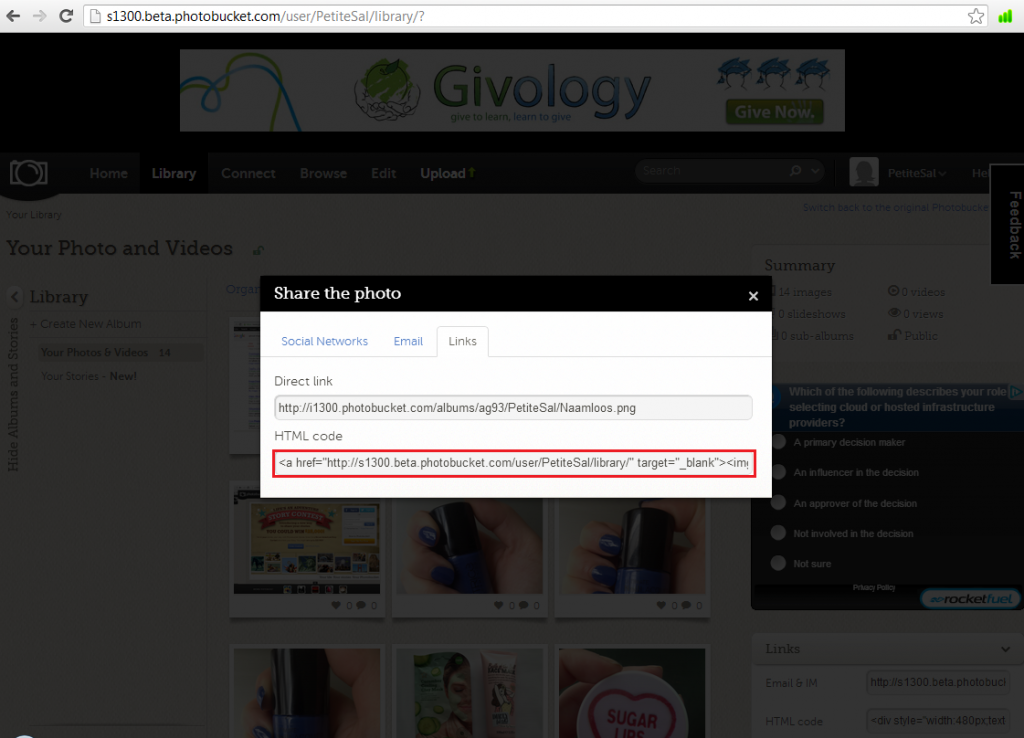
Step 7.
On the screen shot there are only two options, because I removed the rest. But that doesn't matter, because we'll only work with these two options in these tutorials.
With this method you'll need the HTML-code. If you click on the code, it'll automatically copy it.
Step 8.
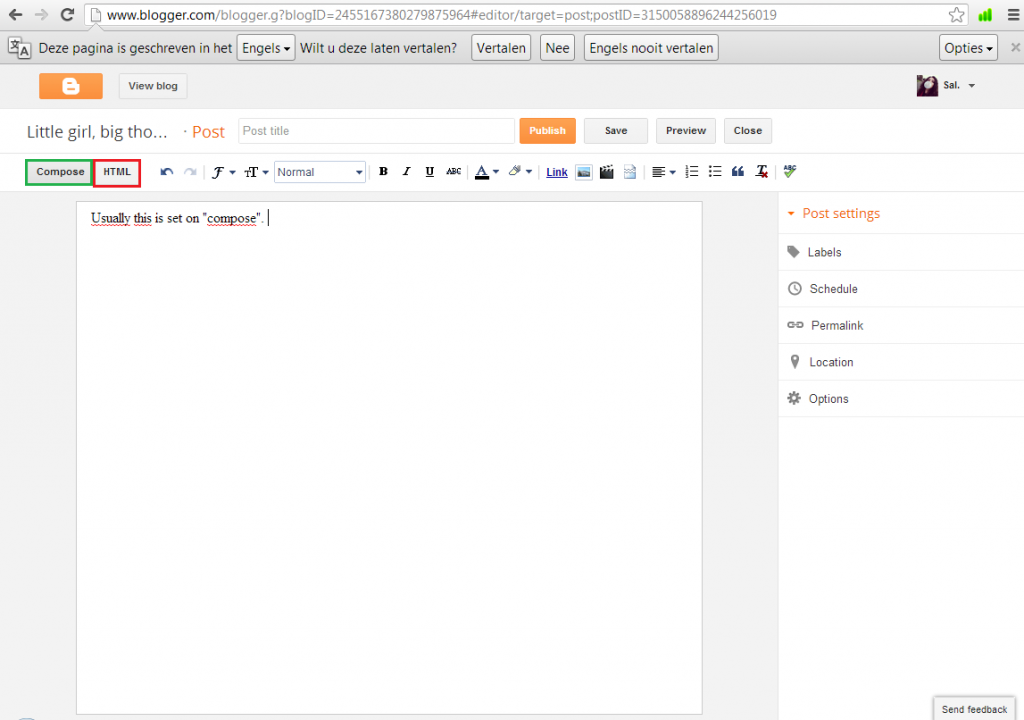
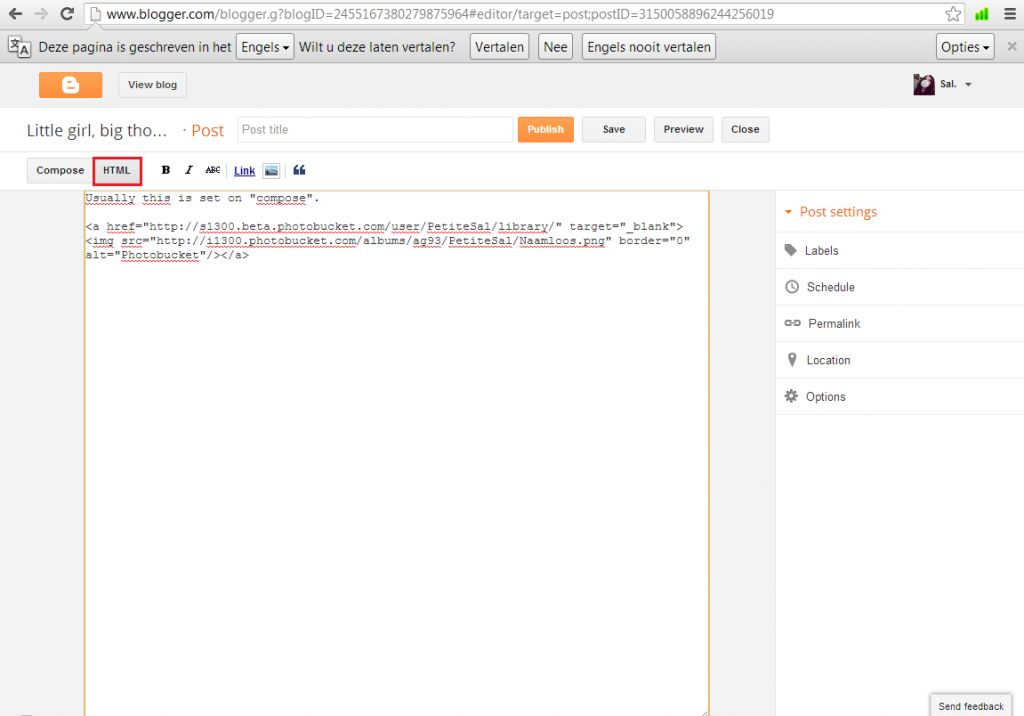
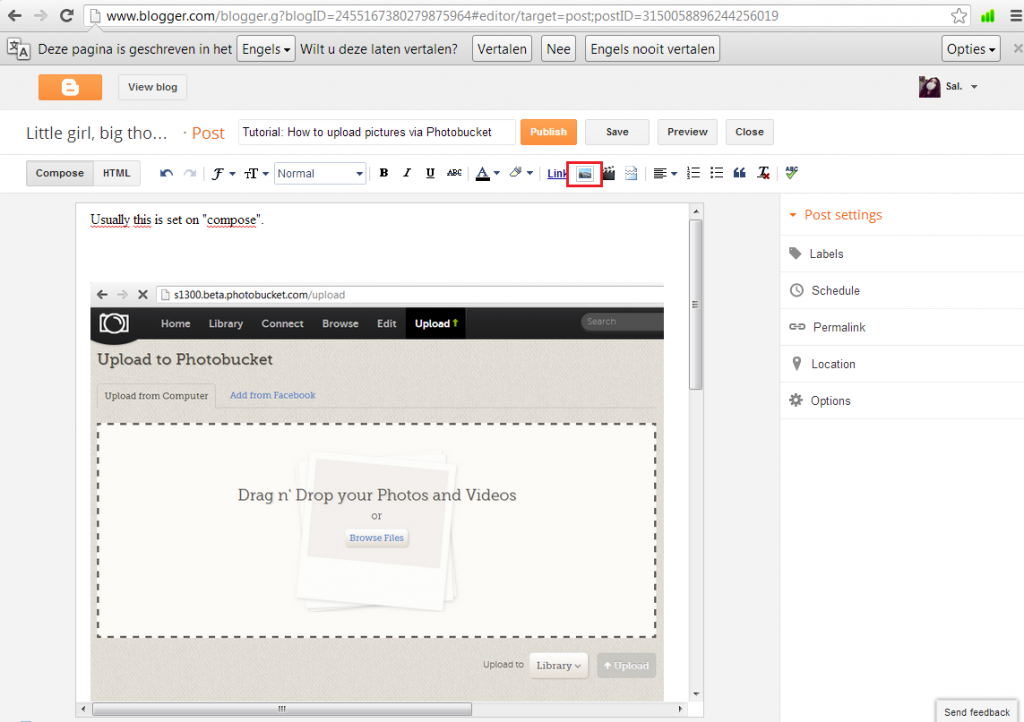
Go to blogger.com and create a new post.
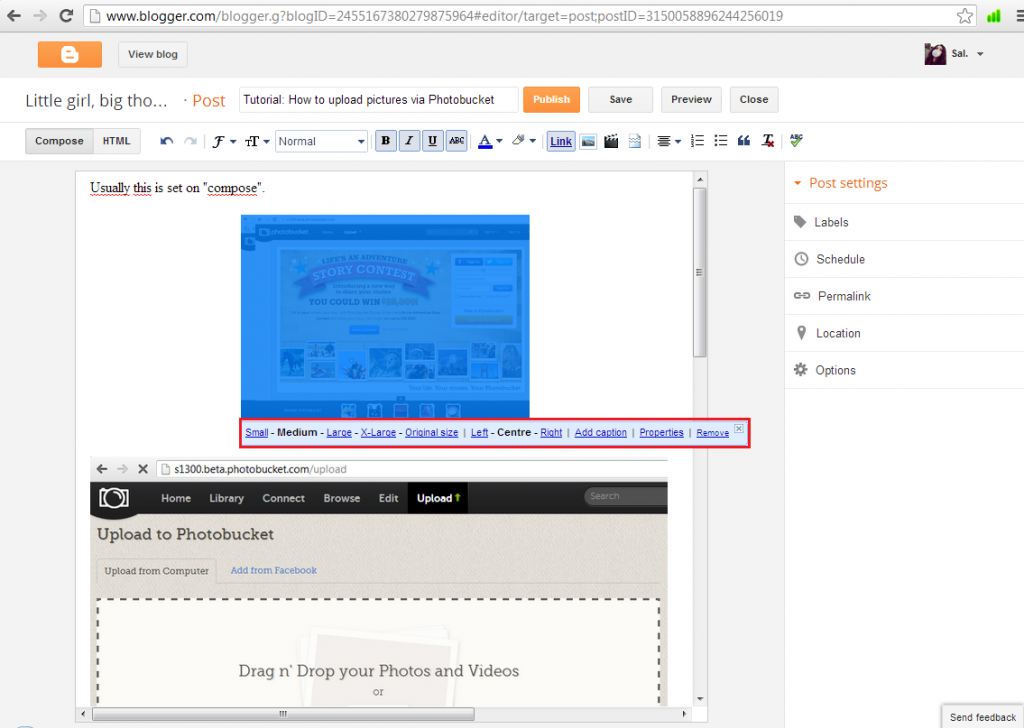
Usually it is set on "compose" (marked green), just like on the screen shot.
But you need to change it to HTML (marked red). Click on HTML.
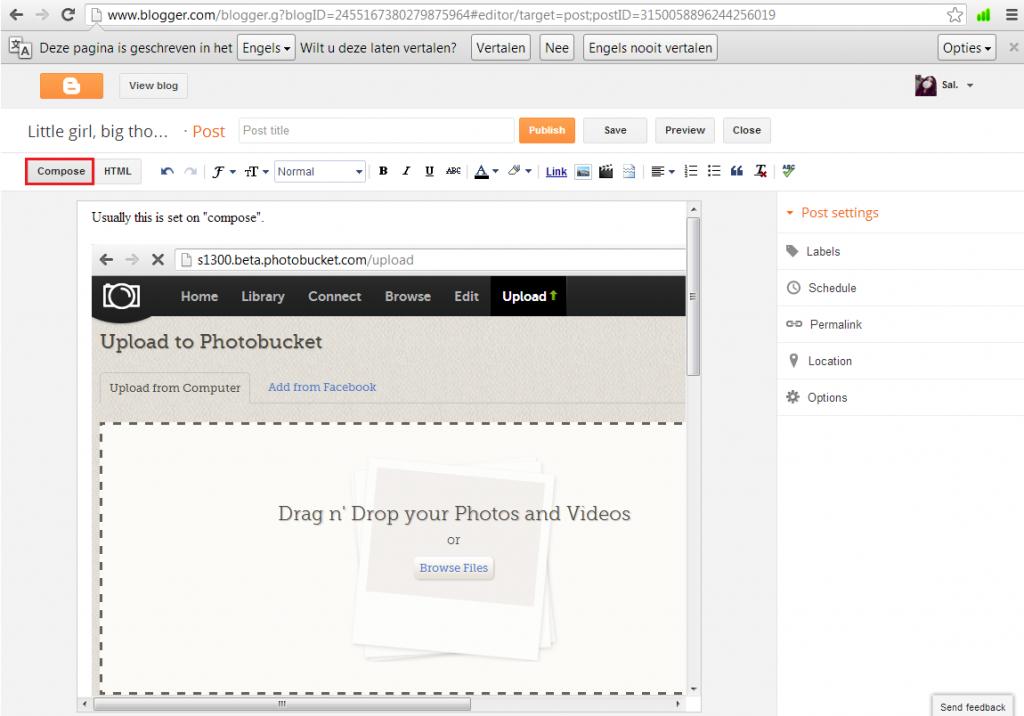
Step 9.
As soon as you clicked on HTML, paste the code you copied from Photobucket.
Photobucket has already set the code for you, so all you need to do is paste.
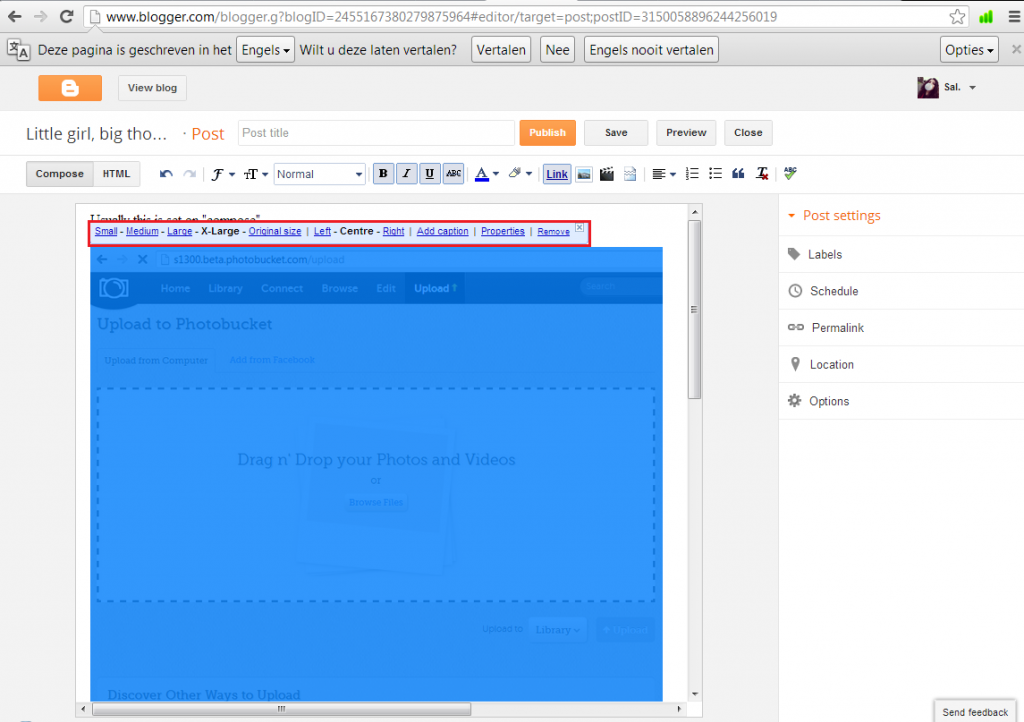
Step 10.
Click back on "compose" (marked red).
Et voilà! There's your image!
Step 11.
Here you can change your image when you click on it, like you're used to. You can resize it, center it, add a caption.. Whatever you like!
Step 12.
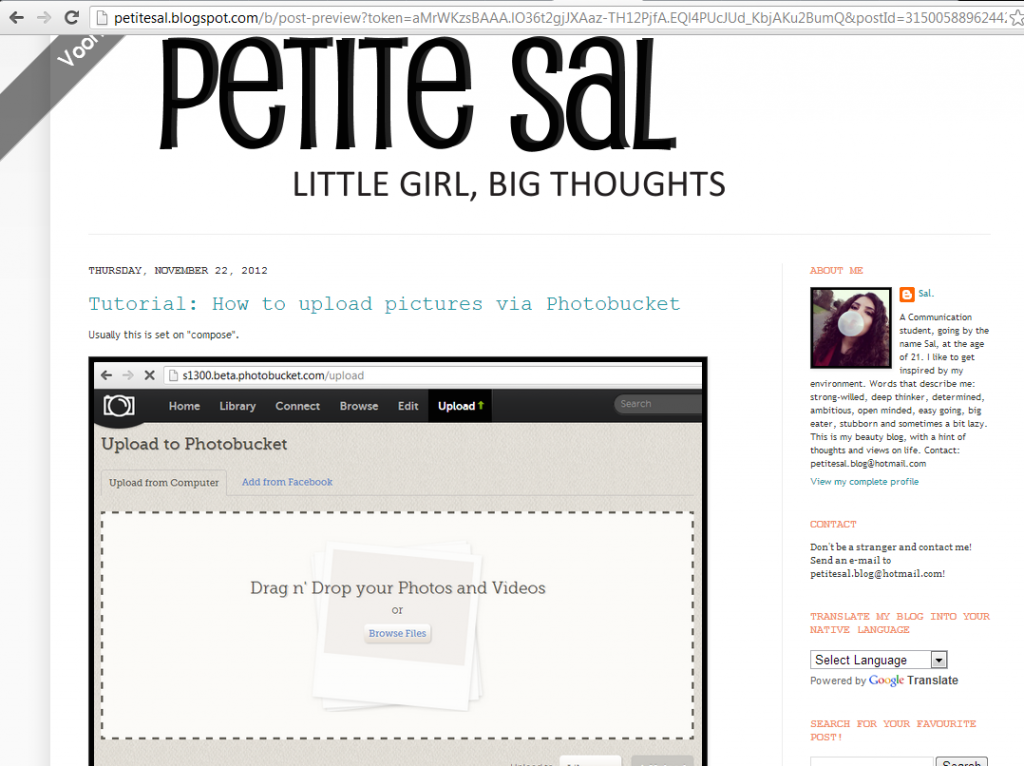
When you click on "Preview" you see that the image is uploaded successfully! Congrats!
You can add text and do whatever you want, exactly how you're used to. The only change is that you have to upload the images yourself instead of Blogger doing it for you.
---------------------------------------------------------------------
Method #2
Now that we've done the first method, here's how you do the second method. As long as you have a link that goes directly to the image, you can apply this method. So it's not necessary to use Photobucket with this one. You can also upload images from the web, without saving them with this method. Just right-click on the image to copy the URL to the image.
For the second method, I start at step 7, because that's where it changes. However, I'll just call it step 1 to keep it less confusing.
Step 1.
Find the direct link to your image. Here you can see the direct link on Photobucket. If you're not using Photobucket, you can find the URL by right clicking on the image you want to use.
Step 2.
Go to blogger.com and click on "Insert image". (marked red)
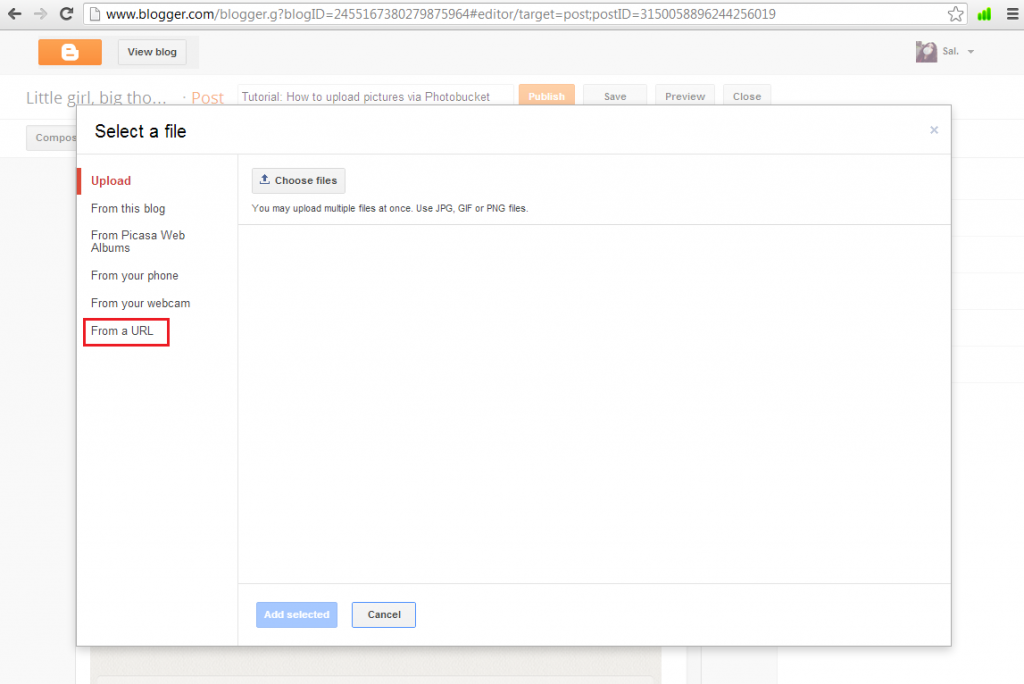
Step 3.
Click on "From a URL", left. (marked red)
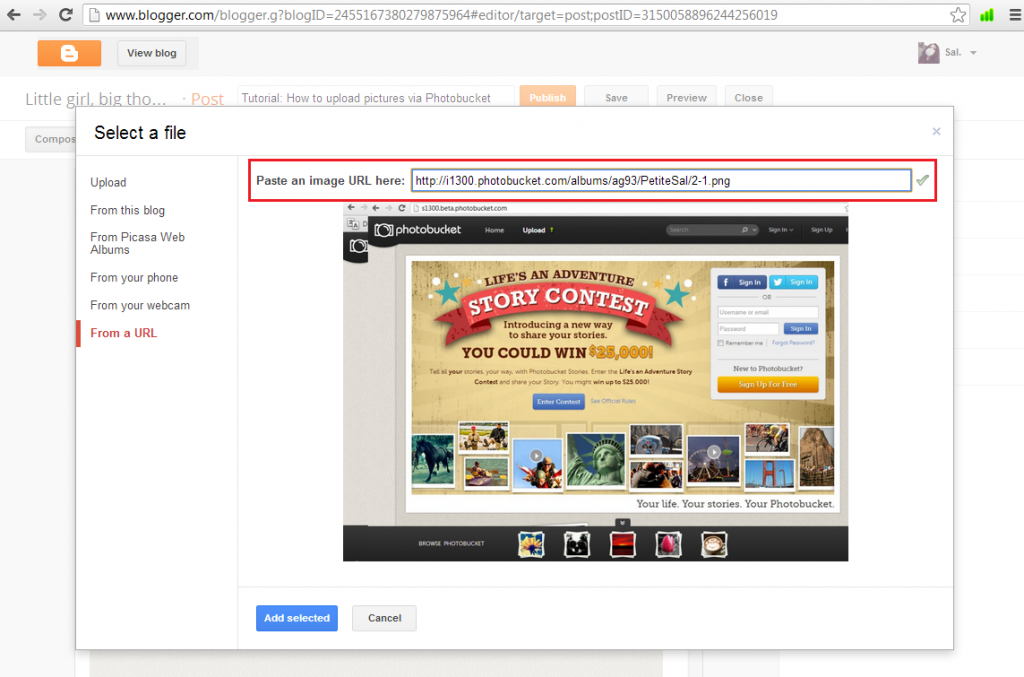
Step 4.
Paste the link you copied in the box. You'll see a preview of the image.
Click below on "Add selected".
Step 5.
Tadaaaa! You just added another image! And again, you can change the size, add a caption, whatever you want!
Play around with Photobucket, see what options it has. I'm planning on doing that soon too.
There's already one thing I discovered: at first your photos are not private. If you're okay with that, no problem. I changed the settings to private, though. So keep that in mind if you want to keep your photos private too (as far as that's possible, since they end up on your blog anyway).
There's already one thing I discovered: at first your photos are not private. If you're okay with that, no problem. I changed the settings to private, though. So keep that in mind if you want to keep your photos private too (as far as that's possible, since they end up on your blog anyway).
Again: I've only been using Photobucket for a day. Like I said, maybe I'm not doing it right either, but this is the way that works for me and hopefully for you too! If you have more tips, please comment them. It's highly appreciated!
I hope you found this a useful tutorial. It looks harder than is, really.
If you have any questions, ask them below in a comment. If you want an answer immediately, send me a tweet (@PetiteSal). You can also e-mail me!
Have a great evening!


omg I didnt know that... y blogger is charging ppl for pics it is ridiculous
ReplyDeletethank u soo much sal for this post I never used photobucket but I will give it a try xxx
Crazy, huh? I didn't know either, but there were some girls panicking on Twitter and wanting to delete their blogs, so I decided to do the tutorial! You're very welcome!
DeleteX
U r the bestest I just tried a method before reading this I got the url n image on successfully one prob image was too big, I resized still same prob ? xx
ReplyDeleteNo problem! It was still too big, even after resizing it? Try uploading it again, see if that works. Before you upload it, close the browser or window where you have blogger opened. Re-open and try it again, see if that works. If not, let me know! And I'll try to think of something else! Xxx
DeleteI tweeted today telling people to use Photobucket instead of blogger after so many were panicking that the images weren't uploading! this is very helpful Sal :)
ReplyDeletehareem x
If you're not familiar wirh Photobucket, I can imagine it brings a lot of stress when you see that blogger wn't upload photos for free anymore! Thank you! :) X
DeleteThanks Sal! I've used photobucket for my social media buttons, don't know why I didn't think about using it for my posts :) xxx
ReplyDeleteYou're very welcome! Glad I opened your eyes hihi :) X
DeleteGreat post - explained perfectly! :)
ReplyDeleteThank you! Glad I could help! :) X
DeleteAwww. You're the bestest of the best! :)
ReplyDeleteI love you XX
Ahhh thank you! Love you too, Deja! <3
DeleteHey Sal, if only I had seen this earlier as I was having the same problem. But someone did tell me to try using Photobucket, and I managed to do it without any problems. In fact, the way I did it was even quicker - after you get the link from Photobucket, you can just click on the little picture icon on blogger as you normally would, and from the menu at the side choose 'upload from URL' and just paste the link into there. Your image appears straight away :)
ReplyDeleteGreat post, I'm sure it helped lots of people out today :)
Mel xx
melswallofmirrors.blogspot.co.uk
Oh wait - I've just looked again and your way is just as easy, I was just confused by the screenshot. The way I did it was obviously with the URL as opposed to the HTML code, hence having to paste it in a different location xx
DeleteI forgive you, my child. Haha :) Thanks for your tip, though! I'm glad I could help! I saw that bloggers were thinking about quitting their blog, because they didn't know about Photobucket and other upload sites and I really didn't want that to happen, so if I only helped one person, I'm happy! :) X
DeleteThanks for the great tutorial Sal - very helpful - going to have a go at 'doing the dirty deed' tomorrow - if anyone can cock it up it's me! Thanks again! xx
ReplyDeleteYou're welcome! Good luck haha! :) X
DeleteSal,
ReplyDeleteI am already using photobucket but some of my friends are having trouble
and this'll be very helpful for them as i am lazy to do a tutorial like yours.